Specifications
There are three types of calibration blocks with notches:
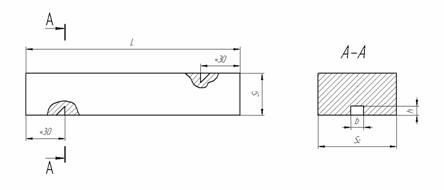
- flat – for testing of flat items and pipes of large diameters; (Figure 1a)
- tubular abutting – for testing transverse welded butt welds in pipes; (Figure 1b)
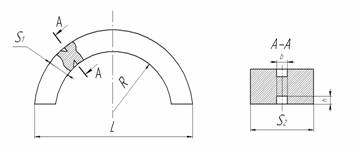
- Tubular longitudinal – for the testing of longitudinal pipe butt welds and bends; (Figure 1c)
Flat calibration blocks are made with one or two notches, pipe- with two, located on the outer and inner pipe surfaces.
Calibration blocks are made of test product material. Heat treatment and calibration block surface quality should be as the test object.
Geometrical dimensions of blocks and notches formed therein are determined by the regulatory and technical documentation for carrying out the testing.

а)

b)

c)
Figure 1 – Typical variants of calibration blocks with notches:
- (а) – Flat calibration block;
- (b) – Piped butt weld calibration block
- (c) – Piped longitudinal calibration block.


